Healthy Pantry Organization for Clean Eating
Healthy Pantry Organization for Clean Eating – One of the best ways to make sure our family eats healthy foods is to keep a healthy pantry organized and stocked with the best food choices! I’m going to share my top tips for healthy pantry organization, plus all of my favorite healthy foods – AND my clean eating shopping list so you can get your healthy pantry organized too!
Clean Eating Basics
In case you aren’t familiar with it, I recently posted about what clean eating is and how it works for our family. We don’t follow any strict eating plans at all, but we try to make healthy food choices most of the time. We limit fast foods, excess sugars and sweets, and processed foods as much as possible.
I like to keep our fridge and pantry stocked with fresh foods and “cleaner” and healthier choices, to make it easy for us to reach for foods that will nourish our bodies! I mean, it’s not like I don’t like Doritos… it’s just that I don’t like how I feel after I eat most of the bag.
You know what I mean, right?
When I feel my best is when I eat foods that are rich in proteins, vitamins, and minerals. Foods that are mostly fresh without a lot of added ingredients. We incorporate a lot of paleo and Whole30 foods (and you can find a lot of recipes here – just search my site), but we don’t adhere to those plans 100%.
Because of this, I wanted our pantry to be filled with these types of foods. And I wanted it to be organized so I could actually find what I’m looking for!
Plus a pretty pantry is like a pretty kitchen – it makes me want to spend more time there, which means I will actually enjoy cooking!

How to Organize a Healthy Pantry
It’s easiest to start your pantry organization project when you’re low on food – BEFORE you go to the grocery store.
Ask me know I know that. No wait… don’t ask.
You’ll also want to do a little prep work before the big day, so you have everything you need. Measure your pantry space and make note of the types and sizes of containers you will need for food storage.
Once you have all of that done, you can get started!
Step 1: Take Everything Out of Your Pantry
Yes, EVERYTHING. Even your secret stash of chocolates. Even your dusty slow cooker. And even that mostly empty bag of goldfish crackers that your kid shoved in the back corner.
Take all of it out.
Loosely organize things on your counters/table so that similar foods are grouped together. This will help later on.
Step 2: Toss/Recycle/Donate/Eat
The goal here is to stock a healthy pantry but that doesn’t mean you have to waste foods considered non-healthy.
- TOSS anything that is expired or stale – including those goldfish crackers you found.
- RECYCLE boxes and jars of foods you need to toss out.
- DONATE non-perishable foods that you choose not to keep. Send them to your neighbor, your mom, or to a food pantry.
- EAT anything that is left that you don’t plan to buy again. This is where I put the last few cheese crackers and cookies and things in bowls and told the kids to snack on them. Then I pulled out random things that I wanted to use up and decided to cook them for dinner so they would get used and then be gone.
Step 3: Clean the Pantry
Wipe down all the shelves. Clean up spilled crumbs. Get the dust and cobwebs out of the corner. Sweep the floor.
Pantry organization works best when everything is all clean – just like you’re cleaning up your health.
If you’re feeling particularly energetic, you can paint or apply contact paper to make your shelves pretty. I didn’t have time for that, so I just gave everything a good scrub.
Step 4: Put Foods in Containers
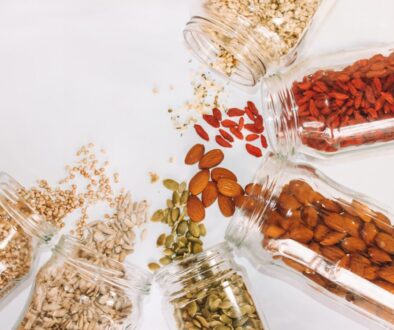
I’ve found that clear containers are the best way to store dry goods. Why? Because I can see what’s in them! No more goldfish bags with only 3 crumbled goldfish in the bottom. With clear containers, I can quickly assess what we have and add things to the list as needed.
Not only that – seal-able containers keep moisture and bugs out (very important when you live in humid climates!).
And shhh – mom secret – my kids don’t know when I’m swapping cereal brands if I just refill the clear containers.
Having containers that are all the same brand/style make a more uniform look, but some of my containers are a little different. I bought these airtight food storage containers for most of our foods. But I wanted these OXO Good Grips Pop Containers for flour and sugar (yes, I do keep these items for very occasional baking).
I also wanted cereal containers because my kids don’t seem to know how to properly close a cereal box. Ever.
One day I would love to ditch the plastic and use only glass jars, but I have clumsy kids and I don’t enjoy picking glass shards out of feet. So for now, plastic it is.
I do have one glass jar that I found on clearance at TJ Maxx. It’s perfect for keeping my rice dry. Mason jars also are great for pantry storage, and can sometimes be found at thrift stores and yard sales – keeping those costs down!
I got cute labels for my containers. Some of the containers came with chalkboard labels, but my handwriting is a little rough and I wanted them pretty.
Step 5: Organize Pantry by Category
Once your healthy foods are all settled into their containers, it’s time to fill up your healthy pantry!
To help you (and your kids) find things easily, group similar items together. For example, in my corner pantry I have:
- Top left – wine, Zavor multicooker, baking supplies
- Top right – Rarely used serving dishes, casserole Crockpot, extra cooking goods
- 2nd top left – cereal, coffee, breakfast foods
- 2nd top right – canned goods, grains, pastas (the “dinner shelf”)
- Middle left – basket with blender, condiments, jarred peppers & olives
- Middle right – canned tuna, coconut milk, seeds/nuts, big kid snacks
- 2nd bottom left – dried fruit, fresh fruit, produce
- 2nd bottom right – chips and snack foods (basically the little kids’ shelf)
- Bottom left – dog foot and treats
- Bottom right – paper goods
- Floor – basket of protein powder, sparkling water, basket of lunch boxes


